Category Archives: Composites
The “Very Large Montage” – How was it done….

I have had a couple of requests today asking how I put together the montage last week entitled “Very Large Montage” …. what an appropriate name. The finished image can be seen above.. I am going to explain this as a step by step guide from the very beginning actually shooting the images.
It was quite impulsive to be honest. I was stood composing an image of the bridge, it has quite a photogenic look to it. I saw the woman walking across the bridge and thought of an opportunity to do something quite different. Keeping the focal length the same I decided to shoot half a dozen images of her actually walking towards me. I tilted the camera to create different angles, all the time making sure I had her in the frame. Samples of these standalone images are shown below.

By the time the knowing actress had passed over the bridge I had captured at least two dozen images of just her. I then made sure that I kept my feet rooted to the same spot and making sure that the focal length of the lens, exposure, shutter speed and ISO were all kept the same I then proceeded to capture the base image for the huge photostitch. I wanted to emphasise the tall bridge stanchions in the final image so I shot plenty of frames that contained this part of the structure. Again, tilting the camera to grab them at different angles, doing it this way makes it much more interesting when doing a photostitch. I also made sure that every image I shot overlapped quite significantly and that I had also obtained enough to complete the full expanse of the scene.
And that is it. All the images from the location are complete, it’s just a case of bringing them home and letting your skill and the power of the modern PC do the rest. There are a number of ways that an image like this can be put together. Some of these are listed below.
1. To manually place all the images on a blank canvas and let them overlap slowly building a complete picture. This is very “David Hockney” and looks quite surreal but fantastic when its complete.
2. Automate the background image using software designed for stitching and then place the figures on manually using Photoshop to add layer masks and blending modes
3. Use a stitching program to complete the whole task, cross your fingers and hope it doesn’t get confused seeing the same figure multiple times.
I suppose there are many more ways an artist can portray this type of image but for the sake of this blog we will stick to these three. For this stitch I used option 2 and let Microsoft ICE do the donkey work and create the background in automatic mode. This would enable me to concentrate on editing the individual images of the figure and matching up the backgrounds to look acceptable. A point worth noting is that I never intended for the edges to be straight, they always were going to be uncut and “shabby”… That was the look I wanted to portray. As with anything, there are no rules when you do this yourself, try a little creativity and come up with something really left-field, its fun.

As you can see, the composite image that MS ICE created has included the original figure from the first frames. When creating the stitch, ICE sources the images from a folder on your hard-drive. I made sure that there were no other images that contained the young lady. This would have only complicated matters as the program reads the images and decides where to place them. I think a moving figure would have confused it somewhat. Anyway, this was a great baseline to work from. I started from the back just placing the first image of the girl so as many of the edges matched with the background as possible. It was never going to be possible to get them all to match but as long as it looked workable then I would be happy. The trick now is not to work on that new layer you have just inserted with the figure on, but to lock that layer in place, make it invisible and move on to the next. This step is then repeated until all the final figure is in place. Now you can make all the layers visible again and you get a good idea of what the final piece is beginning to look like.
It’s now time to work on each figures layer and decide what you want to remove using layer masks. As you can see from my final image, I chose to leave the bottom half of the figures unmasked. I actually spent over 30 minutes masking each figure around each foot, leg and arm and then decided that it didn’t look quite right. It looked somewhat “impossible” without the slightest hint of surrealism. One of the great little tools in Photoshop called the masking tool enables you to remove what you have already masked by merely changing the colour of the brush from black to white. So, I decided to put back all the edges except the ones next to the bridge structure. Playing around with this for about 35 minutes I arrived at something acceptable.
I left all the outer edges of the background as they were when I had put them together and then copied the whole composite on to a black square background. Converted it all to monochrome and added a title. Voila !
Thank you for reading, if you have any questions then please do not hesitate to drop me a line.
Just a stitch in time
A few weeks back I put a post on NMDP that jus not demonstrated my love for panoramas and photo stitching but also showed you how a basic stitch was done using Photoshop (or not) and Microsoft Image Composite Editor. If you missed this post and are still interested then take a look here. This is a very neat and tidy approach to stitching and the completed image looks “politically correct”.
One question I asked myself a long time ago, well before I started doing panorama stitching on the computer was “What is right and what is wrong?“. That’s one of those questions that just screams out “Oh my god here we go again…time for a debate”. Well actually I don’t want an argument or even a debate, I don’t even want opinions that is of course unless you want to offer one. Some of you will say that if two images were joined together then they should be seamless and invisibly joined as if it were just one photograph. Others might say…”well, maybe its a little surreal to make things look a little messy and untidy and its more like art”. Yes, both are correct. I do love a clean image one with straight edges and looks as if it could be taken to a bespoke framer for finishing prior to hanging on a living room wall. But, I also love the shabby approach. Below are two examples of what I am talking about.
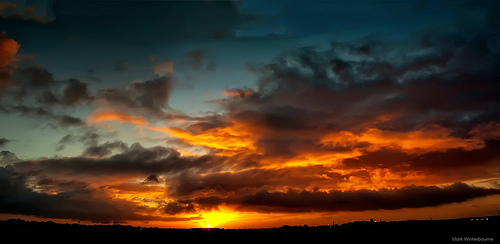
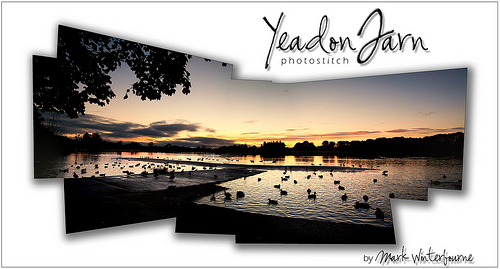
As you will be able to see they are two completely different concepts. Both have their own qualities and I would assume its just a personal choice as to which one you prefer. Once again I am about to refer to a previous post but please take a look at this entry here. Kevin has some great ideas when it comes to stitching and compositing images. He focusses on people photography and portraits with this particualr style in mind. Like I state in the post, I think they look absolutley superb. If you go out with the intention of shooting to stitch then you will go on forever. Over the next few days I am going to work on a couple of different ideas which lean a little bit towards David Hockney’s style and see if they work. Today I spent an hour down at Clarence Dock whilst waiting for a friend to finish at the hospital. Whilst I was there I took about one hundred images, some which were intended to be a stitch of a different kind. I had a ball, a passer by looked at me as I contunually kept tapping away at the shutter, she must have wondered what I was doing. In the space of two minutes I had the whole scene covered.
I am going to put a whole new approach on this one… I’m going to edit it with reckless abandon. No matching of exposures, no matching of edges and no trimming of edges…just a slap dash edit that looks like a work of art.
So watch this space folks. Eventually I will catch up and be able to post you any image. In fact, I might jump the queue and do it now. Thanks for reading, please come back to NMDP and see more. All comments welcome.


![Warhorse | Featherstone [explored]](https://live.staticflickr.com/65535/53586903024_e4b790167a_m.jpg "Warhorse | Featherstone [explored]")
